 +1 713 701 5957
 +44 191 308 5117
 +61 (2) 8003 7653

Odoo Multi Company
Odoo multi company environment is the perfect solution for the needs of multinational companies. On the other hand, it is an outstanding solution to help small companies grow their business. Odoo multi-company feature allows you to manage operations from all your branches with different warehouses, customers, suppliers and products. This feature helps you to buy and/or sell products and services between different branches within your conglomerate.
Relate Purchase & Sale Order

Purchase orders and sales orders can be related in Odoo multi company. If a company within your group creates a purchase or a sales order, the corresponding document is automatically created for your company. All you have to do is check that everything is correct and confirm the sale. You can automate the validation on your sales and purchase orders. It is also possible to only handle invoices and refunds.
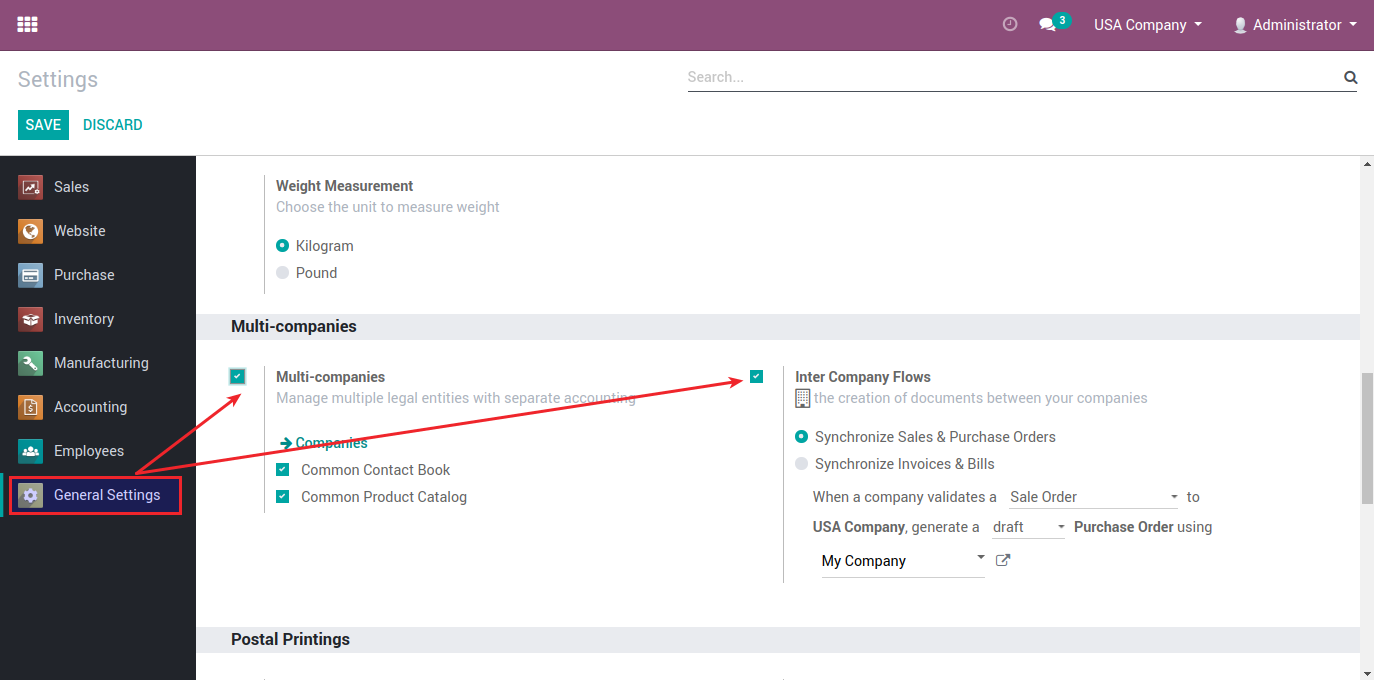
Manage Intercompany Rules
In Odoo multi company, go to settings ‣ general settings. Flag Manage multiple companies and then Manage Inter Company. Click on Apply. New options will appear under inter company. In the drop-down list, choose the company on which you want to add rules. If you click on SO and PO setting for inter company, you will get extra options. When you are done, click on Apply, then you can repeat the same steps for the other companies.
Multi Company Setup

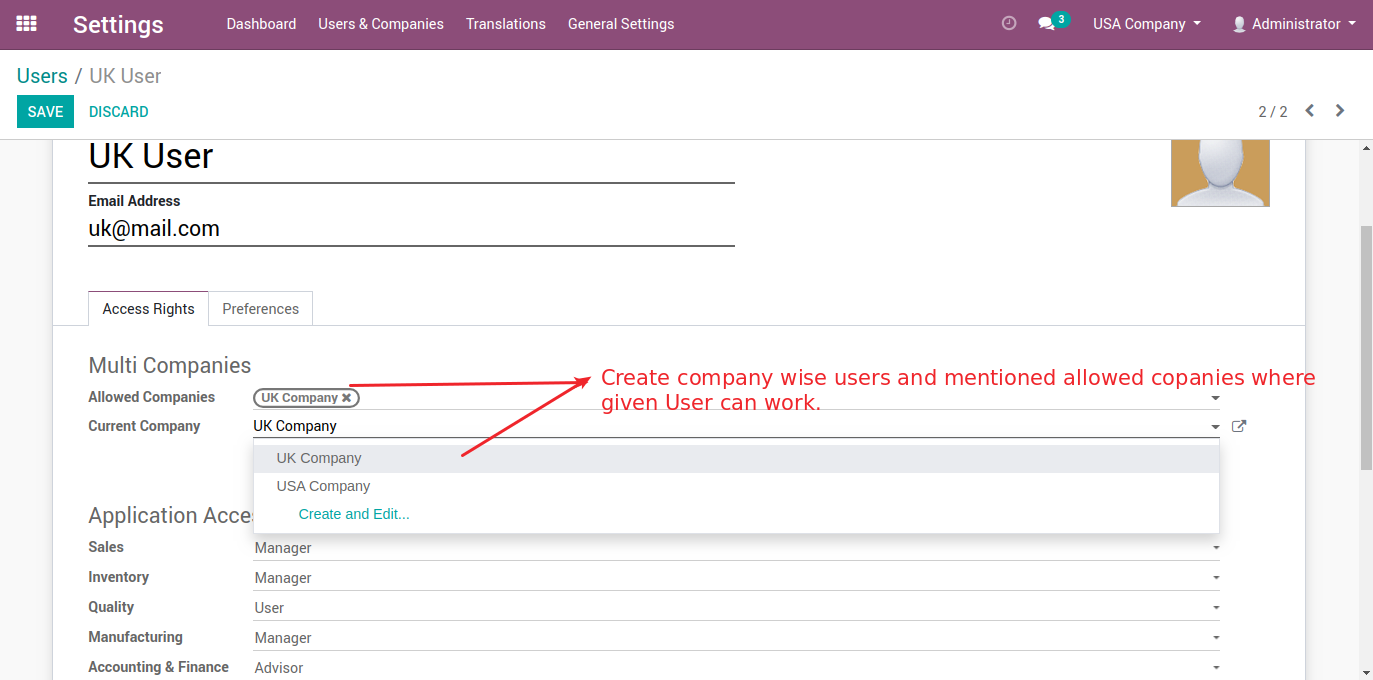
After you give one user (admin) multi company rights by going to settings–>users You need to check on multi companies. Admin user is a multi company user and should be used only for maintaining a regular check and giving access permission to the users. Admin account should not be used for data entry. Create users and give access rights to them for a particular company in Odoo multi company. First a parent company is created with its branches at different locations.
Setting Accounts
Odoo multi company environment has the feature of installing chart of accounts for each company. Select the companies and give a proper chart of accounts. You need to go to settings >> configuration >> accounting. You will need to maintain separate warehouse for each company. To do that, you need to log in as company user and create warehouse. By default, a location(../stock) is created and you can create more locations as you wish.

Creating Journals for each Company in the System

After configuring chart of accounts for each company in Odoo multi company environment, we need to configure warehouse locations. For that we need to go to Warehouse -> Configuration -> Locations. If you are not able to see the option Locations, go to Settings -> Configuration -> Warehouse. In ‘Location and Warehouse’ there is a checkbox ‘Manage multiple locations and warehouses’. Check it and click on apply. See the image below. Once done go to Warehouse -> Configuration -> Locations. Configure locations for each company. In the form view, there is a ‘Company’ field. Enter the name of respective company when you create.
Warehouse Configuration
Now, for Warehouse configuration, go to Warehouse -> Configuration -> Warehouses. Create separate warehouses for separate companies in Odoo multi company. For each warehouse we need to define Location Input, Location Stock and Location Output. Also, for each warehouse we need to enter the name of the respective company. Image below is the list view of the Warehouses.

Configuration of Products

In Odoo multi company, you may configure any product as a global product or as a product specific to a company. You will see products in Sales, Purchase and Warehouse. Go to Warehouse -> Traceability -> Products.
Configure Users for Different Companies
To configure user, go to Settings -> Users -> Users. Click on ‘Create’ to create a new user. In the form view, you can enter the details like User’s name, Login name, password etc.